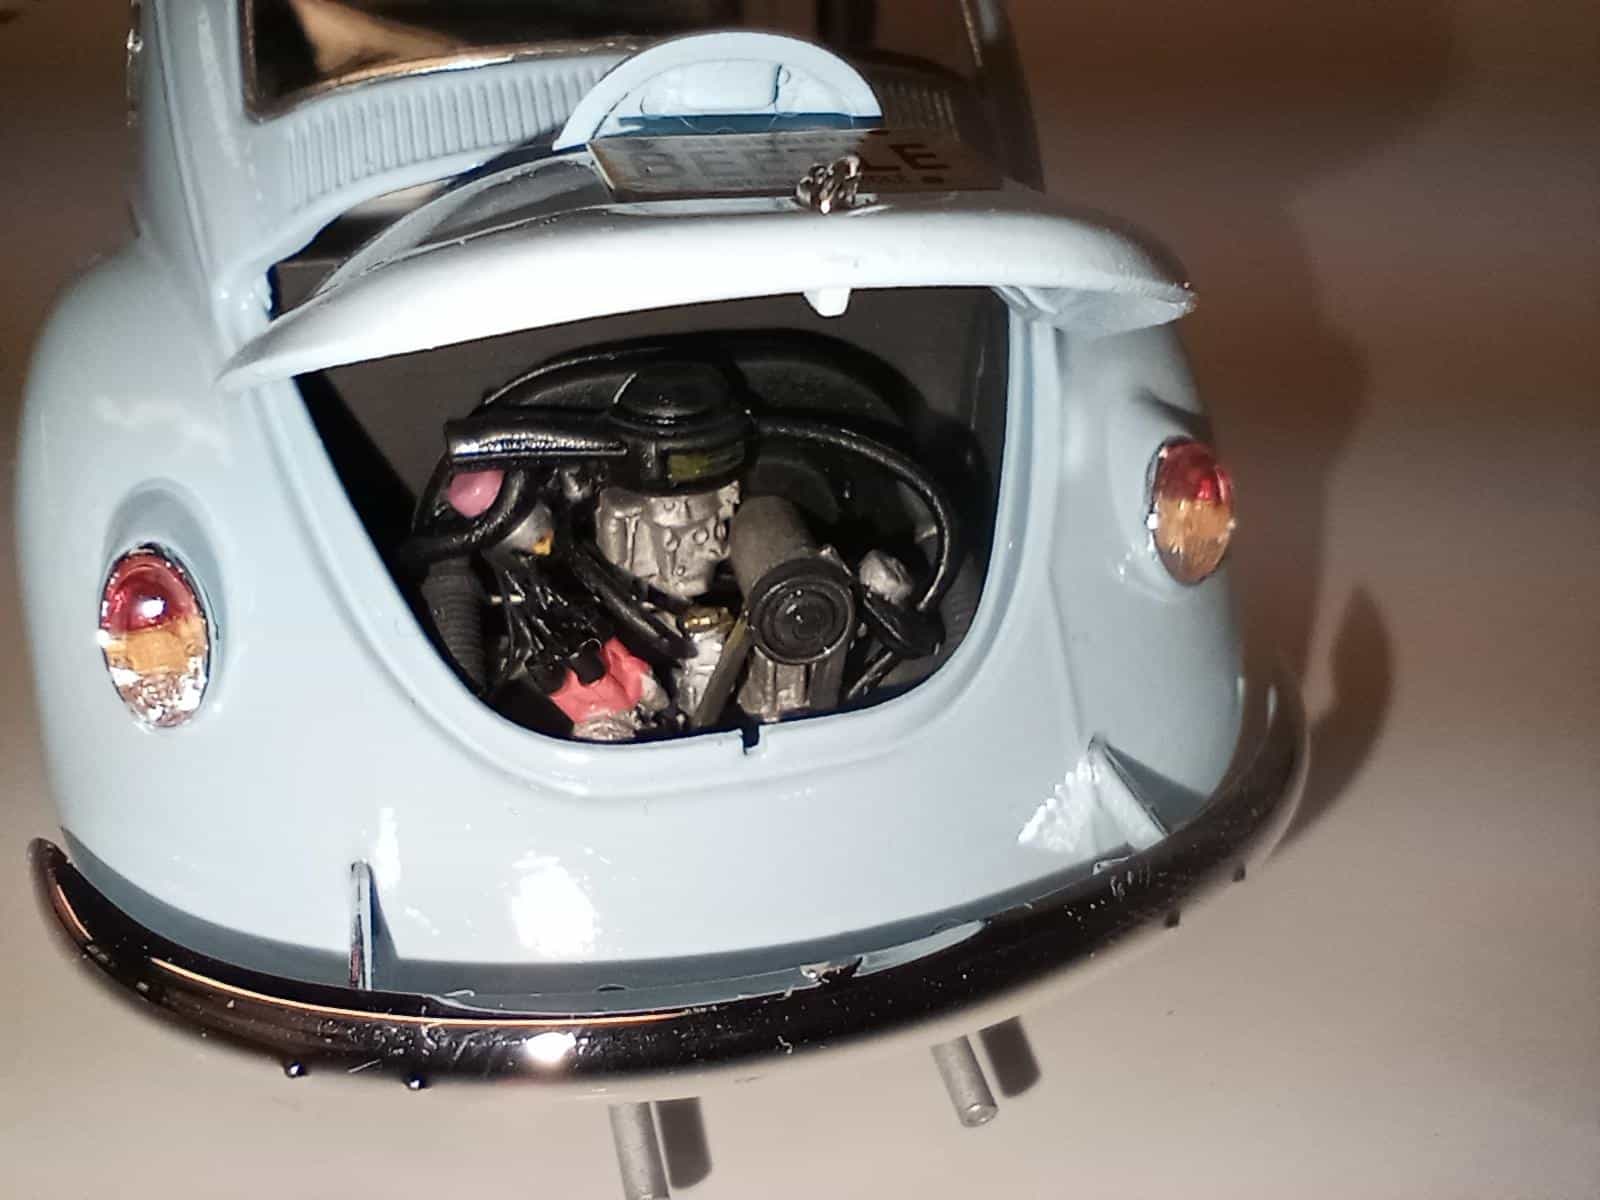
Step-by-Step Guide to Assembling VW Beetle Engine Model Kit

If you’re a fan of classic cars or model building, assembling a VW Beetle Engine Model Kit is an exciting and rewarding project. This kit lets you build a miniature version of the iconic Beetle’s air-cooled engine, giving you a hands-on understanding of how it works while creating a fantastic display piece. The process can seem complex at first, but with patience and the right guidance, you’ll have your model engine running smoothly in no time.
This detailed step-by-step guide will walk you through the entire assembly process, from unpacking your kit to the final test spin. Let’s get started!
Preparing Your Workspace and Tools
Before you dive in, make sure you have a clean, well-lit workspace. Organising your tools and parts will make the build easier and more enjoyable. Here’s what you’ll need:
Tools:
Small Phillips and flathead screwdrivers
Hobby knife or sprue cutters to remove parts from frames
Fine sandpaper or a small file for smoothing edges
Tweezers for handling tiny components
Plastic or model glue (if your kit requires it)
A small container to hold screws and tiny parts
Workspace:
A flat surface covered with a cutting mat or newspaper to protect your table.
Instructions:
Keep the instruction manual close by and read through it once before starting.
Step 1: Unboxing and Sorting Parts
Open your VW Beetle Engine Model Kit carefully. Inside, you’ll find plastic sprues holding the parts, metal screws, rods, and sometimes rubber or plastic hoses. Lay everything out and check the parts list in your manual to ensure nothing is missing.
Use your sprue cutters or hobby knife to carefully remove each part from the sprue. Be gentle to avoid damaging delicate pieces. After removal, use sandpaper or a file to smooth any rough edges or leftover plastic nubs.
Step 2: Assembling the Engine Block
The engine block is the heart of your model. Begin by assembling the two halves of the block as per the instructions. This usually involves fitting the crankshaft inside the block. Make sure the crankshaft spins freely once installed—this is crucial for the engine’s movement.
Use screws to secure the block halves together tightly but don’t overtighten to avoid cracking the plastic.
Step 3: Installing Pistons and Cylinders
Next, attach the pistons to the crankshaft. The pistons move up and down inside the cylinders, mimicking the real engine’s operation. Carefully align the pistons and cylinders according to the manual, ensuring smooth movement.
Check that the pistons slide easily within the cylinders without binding. This step is key to making your model engine “run” when you turn the crankshaft.
Step 4: Building and Attaching Cylinder Heads
The cylinder heads fit on top of the cylinders and usually contain valve details. Assemble any small components like valves or rocker arms before attaching the heads to the engine block.
Make sure to align the heads correctly and secure them firmly. These parts add realism and detail to your model.
Step 5: Adding the Carburettor and Intake Manifold
The carburettor and intake manifold control the air and fuel mixture in the engine. Attach these parts carefully to the engine block. Some kits have detailed carburettor parts that may require glue or screws.
Ensure all connections are tight to keep the model looking authentic.
Step 6: Fitting the Exhaust System
Attach the exhaust pipes and muffler to the engine block. The exhaust system might include curved pipes or small mufflers that fit into specific slots.
Take your time with this step, as the exhaust parts can be fragile and tricky to fit.
Step 7: Wiring, Hoses, and Final Detailing
Many VW Beetle engine kits include wiring, spark plug cables, and hoses to add realism. Use tweezers to place these small parts carefully, following the colour-coded guide in your instructions.
This detailing stage really brings your model to life and makes it look like a miniature working engine.
Step 8: Testing Your Model Engine
Once fully assembled, your VW Beetle engine model should allow you to turn the crankshaft manually. When you do, the pistons should move up and down smoothly, and the valves might even open and close depending on your kit.
If something feels stiff or stuck, double-check your assembly to ensure all parts are aligned and screws aren’t too tight.
Helpful Tips for a Smooth Build
Take your time: Rushing can lead to mistakes or broken parts.
Keep small parts organised: Use containers or trays to avoid losing screws and tiny components.
Follow the instructions carefully: Each kit is different, so read each step before starting.
Ask for help if needed: Online forums and videos can be great resources if you get stuck.
Be patient: Some parts may require gentle adjustments or reassembly.
Why Choose a VW Beetle Engine Model Kit?
Building a VW Beetle engine model is not only fun but educational. It helps you appreciate the engineering behind one of the most beloved cars in history. Plus, it makes a fantastic display piece for your home or office.
If you’re looking for high-quality kits and accessories, The Weedub offers a great selection of VW Beetle scale models and engine kits. Their products are designed for enthusiasts and collectors alike, ensuring you get an authentic and enjoyable building experience.
Building your VW Beetle Engine Model Kit is a rewarding journey that combines craftsmanship, learning, and nostalgia. With this step-by-step guide and a bit of patience, you’ll soon have a stunning miniature engine that captures the spirit of the classic Beetle. Happy building!

